
There is a lot of effort that takes place behind the scenes when video content is created that either goes unnoticed, is greatly downplayed or just generally misunderstood. I would like to shed some light on some of these time consuming tasks to uncover some common misconceptions and to reveal what actually goes on during the process.
There are numerous processes that would benefit from more exposure, however I will begin by only taking you through three of the most commonly used and misunderstood techniques surrounding video and motion graphics.
The three processes we will be looking at today are 2D Character Animation, Stop-Motion Animation and a post-production technique called Rotoscoping.
Understanding the process behind these services will help you better evaluate your next creative video project. You will truly be able to know what it entails and understand the risks and different variables that affect the timeline and budget.
Keep in mind this isn’t a step by step tutorial for how to create this content, it’s just a general overview of what takes place when someone asks for one of these services to give you better insight into the process.
2D CHARACTER ANIMATION
When most people think about animation they think of a cartoon character that walks, talks and interacts with their environment. It's become so common and mainstream to see a character animation in commercials, TV shows and movies that the majority of people see it as something normal and perhaps even "easy". They don't realize how much time actually goes into making that character move around on screen.
My goal is to simply pull the curtain back a little to give a basic understanding of what it takes to actually create a character animation. Even the simplest animations require a lot of time and prep work that you wouldn't normally think about.
For this example, I will be using a recent character animation we did that required taking a static image of a T-Rex and manipulating it so it could run and open its mouth to roar. Let's take a look at some of the steps required to do this.
1. GATHER ASSETS/PREP IMAGE
First we have to gather any assets we need for the character, in this case all we need is an image that shows the side view of a T-Rex.
Once we have the image we need to cut the character out of the background and begin prepping it for animation. We want to be able to manipulate the T-Rex so he can roar and run, to do this we have to separate each body part that will be moving independently which includes the jaw, both arms and both legs. We simply cut them out and put them on separate layers. Since the side view only shows one leg and one arm we have to duplicate them and place them behind the body.
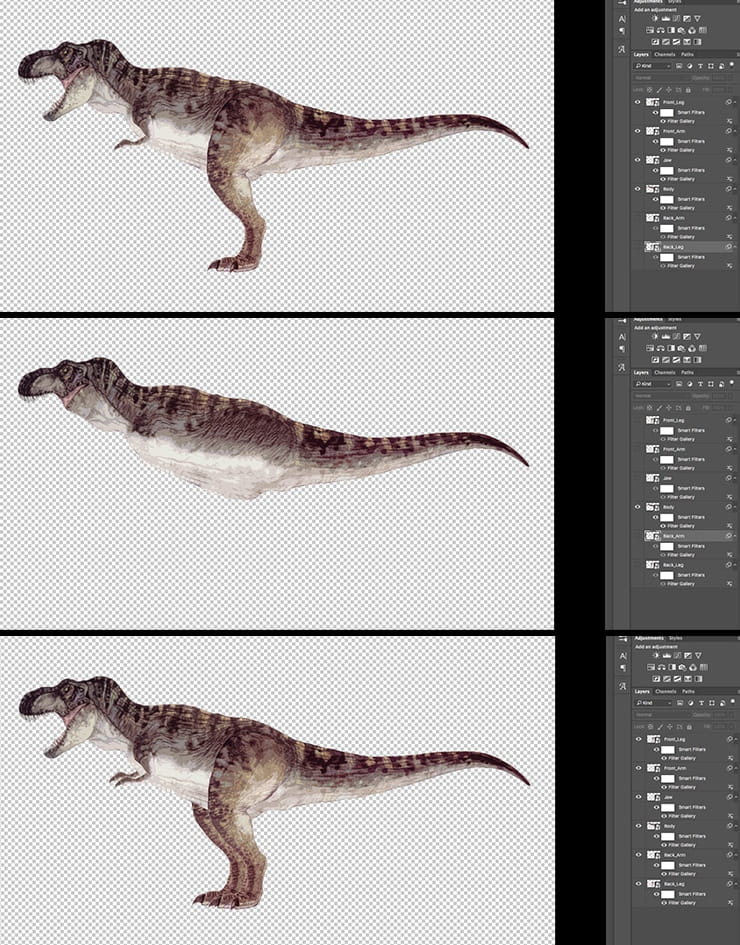
2. RIGGING
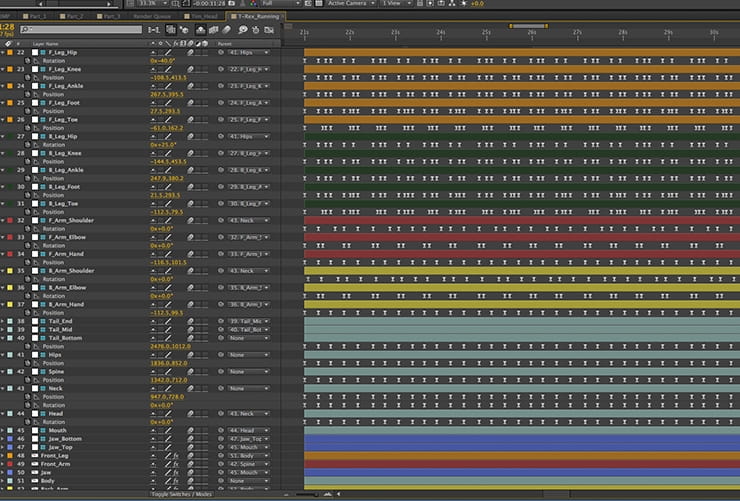
Once the character is all cut out we have to set up the images so they can be individually controlled for animation and we do this in animation software (in this case After Effects). First we have to separate each body part onto its own layer so it can move independently from each other. Now we can begin rigging, which is essentially giving the character "bones" so we can have complete control over the movements of these body parts. The character is given pivot points where the joints would be in real life, all the pivot points are linked together so it functions like a real skeletal system. This makes is much easier to control and manipulate the character but setting it up is still a very laborious and repetitive process.
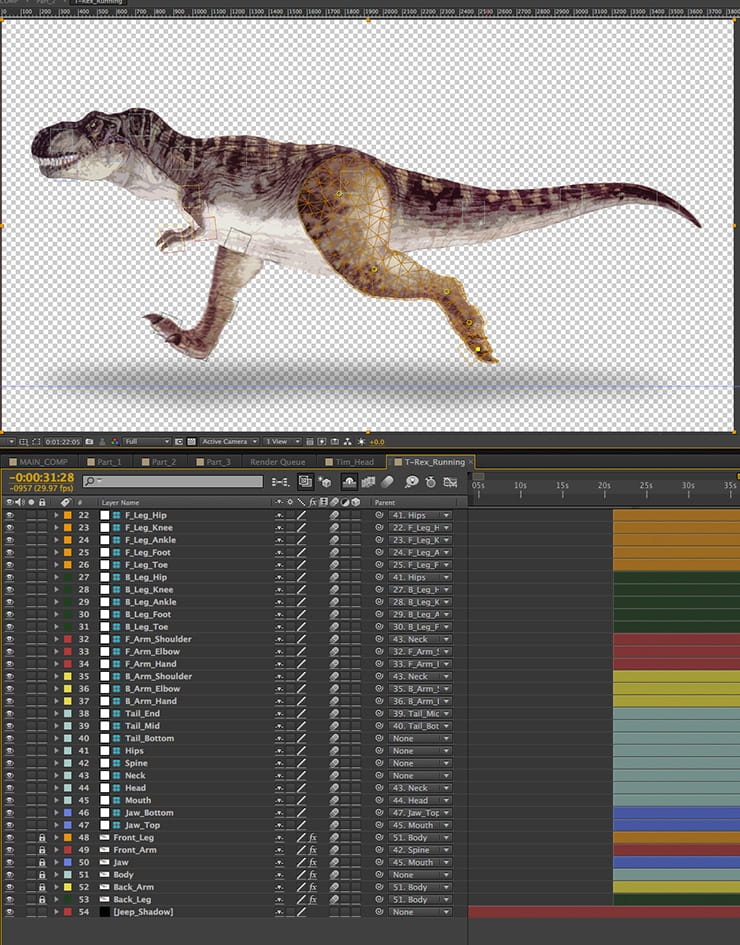
3. ANIMATING
Now that the character is fully rigged we have complete and independent control to start animating. To do this we have to manually record each movement by placing "keyframes" at different points along the timeline. This is done to every individual body part and can be as simple or complicated as you want to make it. The traditional way to animate was to hand draw the same image frame by frame. Fortunately for us, computers have come a long way in aiding animation and making it a lot easier, however, it still takes a lot of time and patience to make it look natural and realistic. A few seconds of character animation could take days to complete depending on the amount of movement, overall style and level of detail.
Here is a small loop of what the final product looks like after we animate this T-Rex to run.

STOP MOTION ANIMATION
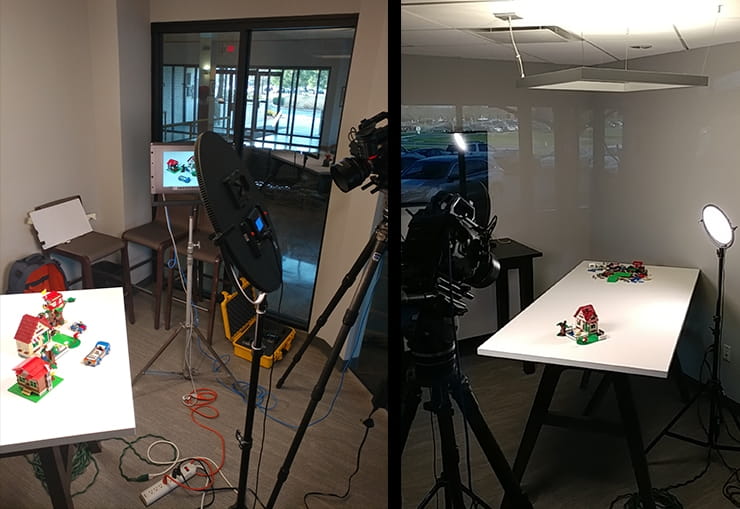
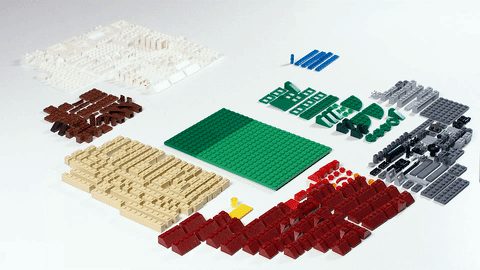
Most people are familiar with stop motion, or at the very least have seen it somewhere before, but they usually aren't aware of the tedious creation process. Stop motion is an animation technique where a real object is manipulated and captured frame by frame, moving very slightly every time, to give the illusion that it's moving on its own. For this example, I will show you the general procedure for a recent stop motion animation we created using LEGO bricks.
1. PLANNING/STORYBOARD
Having a solid plan or storyboard is probably the most important step in the stop motion process. Because stop motion is captured in small increments, frame by frame, it has a much higher margin for error than other video and animation methods. If you don't have a clear cut plan or detailed storyboard to follow you will most likely make a mistake and have to start from the beginning which adds more time and money than originally intended. So before you do anything, sit down and make a list of everything you will need for the shoot and the specific order of shots you need for the animation.
2. SETUP
Once you have your plan and storyboard in place you can begin setting up the scene. This is a simple step but it's very crucial to have everything in its proper position. The camera needs to be completely locked off so it doesn't move by accident, along with all the lighting and any other static objects. Everything needs to be consistent throughout the entire shoot or the final product won't look convincing.
3. ANIMATION PROCESS
The actual process of making the objects move is the most painstaking part and requires a lot of patience. For this specific project we are having a pile of LEGO bricks come together to build a house. This process is actually much easier if you start with the object in its final position and move backwards in time, this helps prevent any mistakes especially when something is being built. So in this case we start the first frame with the house fully constructed and frame by frame we take off one piece at a time until the whole house is deconstructed. It's very important to move completely out of the frame and out of all the lighting for about 5 seconds after each piece is removed to ensure consistency throughout the animation. This can take many hours depending on how many pieces you have.
4. EDIT
Once production is complete we can take this footage and drop it into video editing software (in this case Premiere Pro) and begin slicing up the video. Every time the object moves and everyone is completely out of the frame you slice the video clip and delete the parts you don't need. This editing process can be very time consuming as well depending on how well it was shot and how long the actual video is. If done correctly, you will be able to reverse the footage and it will look like the LEGO bricks are moving and building a house without any outside influence.
Here is a loop of the house being built.
ROTOSCOPING
The final process I want to bring to light is in a post-production technique known as "rotoscoping". In video, the term rotoscoping refers to the method of manually creating a mask for an element in a live action video. You may not be familiar with the technical term but you have definitely seen its benefit before which is why I think it's important to get this technique some exposure.
Rotoscoping is utilized in many different ways, but, generally speaking, it's used to remove unwanted objects from a video or include a new element that wasn't in the original footage. The rotoscoping process is fairly simple, it's just very time consuming and requires a lot of patience. For this example, we have some typography that will be masked behind a man walking down a sidewalk.
1. CREATE MASK
The first thing we do is duplicate the footage and create a "mask" of the object that will be brought to the foreground, in this case we will be masking out the man as he walks down the sidewalk. A mask is essentially digitally cutting out a piece of the footage so it can be manipulated separately. We start at the first frame and simply draw a shape around the man.
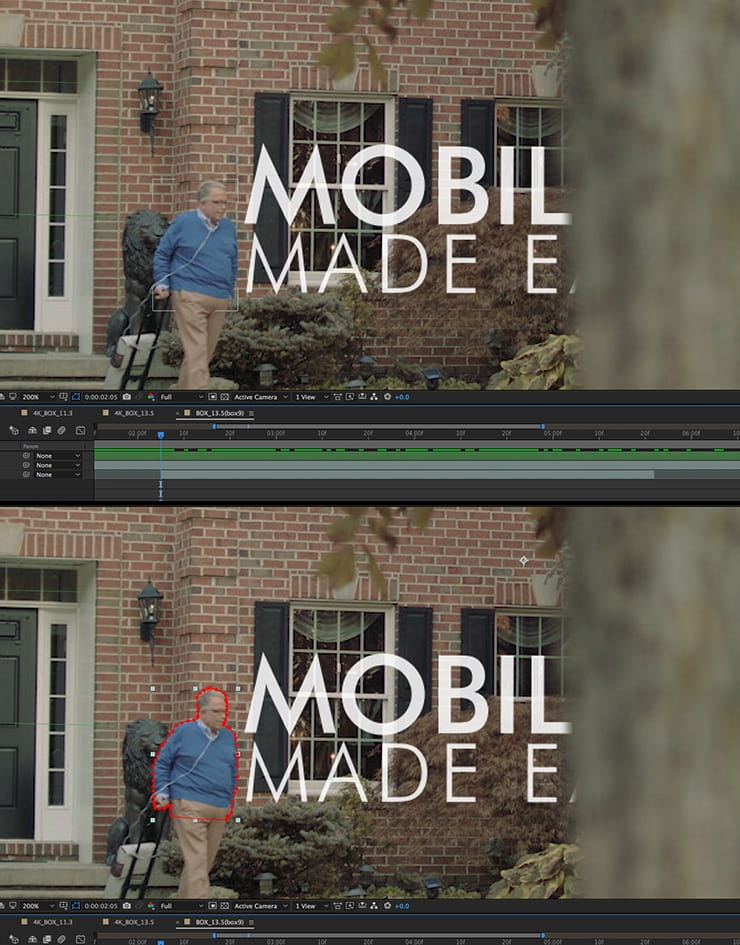
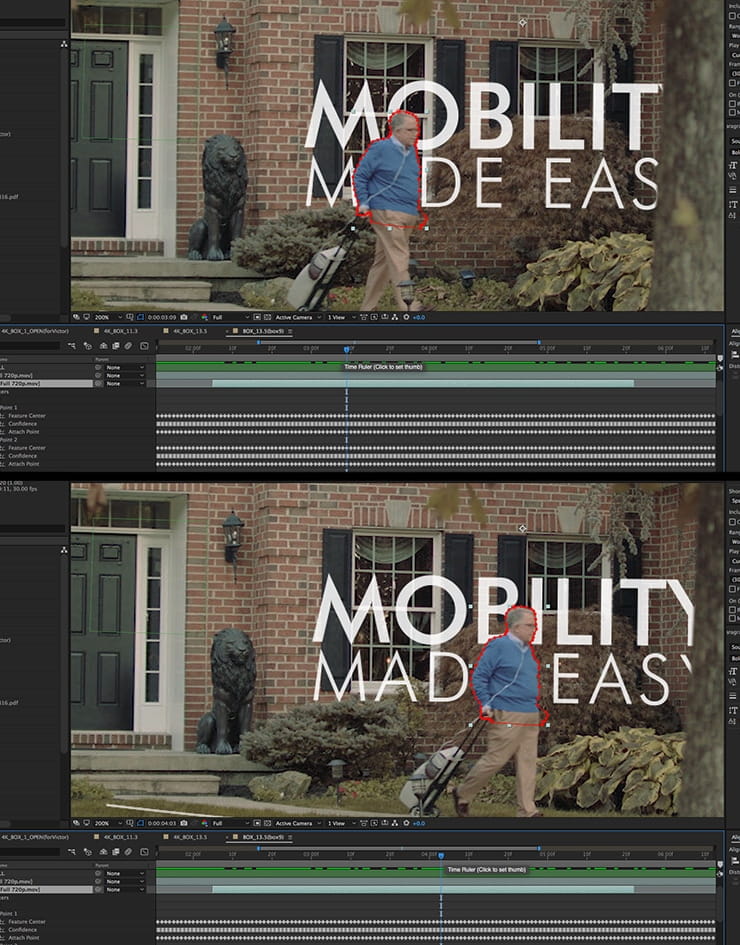
2. ANIMATE MASK
Now that we have the initial mask set up, we can start animating it. The manual manipulation of this mask is what is referred to as rotoscoping. We are moving the mask frame by frame and recording the movement. This is where the labor and time comes into play. Each frame the mask needs to be repositioned and altered to conform around the man. You can spend as little or as much time as you want on this step, but the more time you spend on this the cleaner the mask will look in each frame resulting in a very professional looking final product.
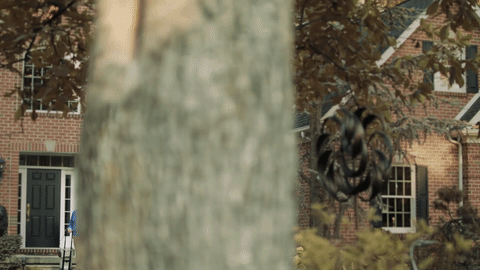
That is essentially all there is for the process of rotoscoping, this takes a lot of time because, like the other techniques, it requires frame by frame animation and attention to detail. Here is loop of the final result of that rotoscoping effort.
Understanding the process behind any service is essential in understanding why certain processes and techniques are so time consuming, and it's crucial to understand the potential risks that come along with it. The examples and processes that I have described here are not one size fits all, there are many different variables that can affect any one of these techniques that could potentially shorten or lengthen the creation process.
Are you considering one of these techniques for your next video project? Get in touch with us today for expert execution from start to finish.