Back in March I revised the HTML5 multiplayer node.js example to use WebSockets instead of RESTful calls. Moving to this event based system of communication allowed for more streamlined code and native multithreaded performance. If you haven’t had a chance to read the previous posts in the node.js series, you can catch them here:
- Recipe for Real Time Multiplayer with HTML5 Canvas & Node.js Part 1: Backend
- Recipe for Real Time Multiplayer with HTML5 Canvas & Node.js Part 2: Client
- Real Time HTML5 Canvas & Node.js: Now with Sockets!
Before reading ahead, grab the code under the sockets branch.
Playing Nicely
HTML5 is great and all, especially with the fantastic Pixi.js renderer, but what if I wanted to reach beyond a browser? I could have wrapped the existing HTML5 implementation in an app and called it a day, but performance and blog material would suffer. That is where Unity joins the party. Unity is a popular tool for producing cross platform games and experiences for almost every device out there. Grab Unity it to follow along.
Getting Started
My goal was to keep the existing backend service and just treat the Unity app as another client. This had the added benefit of HTML5 clients playing in the same sandbox as the native app. Once you have Unity installed, and your first project created, you’ll need a few more things. In the Unity Asset store, find and install the following to your project:
SocketIO
A Unity implementation of socket.io.
LeanTween
A popular tweening engine for Unity.
Scene Setup
OK, now that we have all the prerequisites we can focus on the build. Keep in mind that this is a sample and not intended for production use.
1. Enabling WebSockets in Unity
Thanks to the makers of SocketIO, this is incredibly easy. Add the SocketIO prefab to your scene.
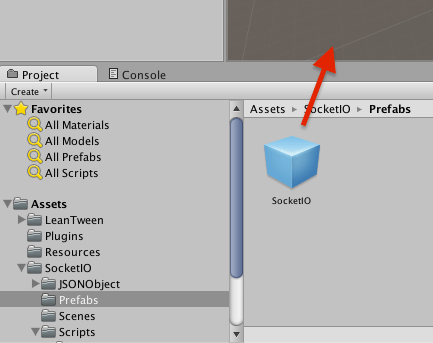
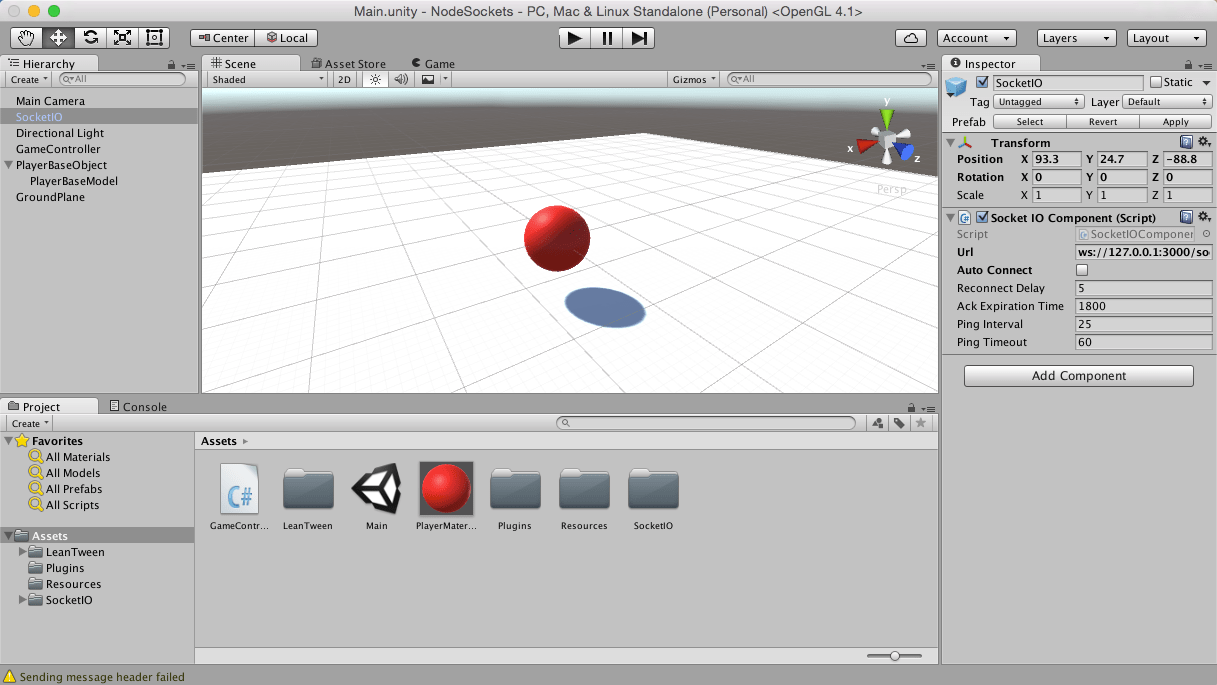
After you have dropped the prefab into the scene, select it from the Hierarchy window and look at the properties on the right. For this sample I opted to connect via code, so uncheck Auto Connect.

2. Creating a Player Avatar
- Next, create and Empty GameObject by choosing GameObject -> CreateEmpty and rename it to PlayerBaseObject. In the Inspector on the right, set the position to 0 (zero) for X, Y and Z values.
- Create another object, this time with a mesh with the top menu option GameObject -> 3D Object -> Sphere. Rename that object to PlayerBaseModel.
- Then click-n-drag PlayerBaseModel into PlayerBaseObject so it looks like this…

- Create two materials and name one PlayerMaterial and the other OtherPlayerMaterial. Create a new folder under Assets called Resources and move OtherPlayerMaterial to that folder.
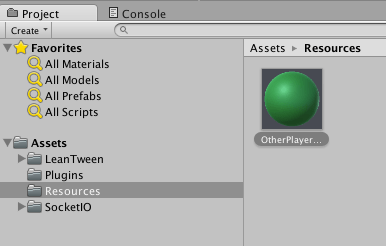 This is required to be able to dynamically assign the material during runtime.
3. Scenery
We will need something as a backdrop to our player spheres. Create a ground plane by choosing GameObject -> 3D Object -> Plane. Move this plane down so it is just below the sphere you created earlier. Rename the plane to GroundPlane.
4. The Game Controller
This is the code that will manage interactions, connections and game state. Create an empty game object by by choosing GameObject -> CreateEmpty and rename that to GameController.
Now your scene should look something like this…
Code Time
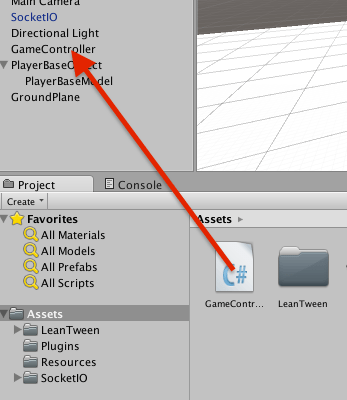
With the Unity scene setup, you can now start coding. Rather than presenting all the code for you here, I’ll focus on key differences between the HTML5 version and this Unity client. Grab the Git repo and then copy the sample class, GameController.cs into your project by selecting Assets -> Import New Asset… You can find the sample under NodesSockets->Assets. Once imported, drag the GameController.cs class to the GameController GameObject like so…
Assigning the Player Avatar
After you assign the GameController code, select the GameController object and look at the inspector on the right.
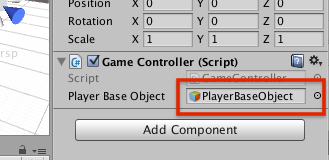
Note the property called Player Base Object. This exists because of the public GameObject code declaration here:
public GameObject PlayerBaseObject;
Now select the dot to the right of the field and pick the PlayerBaseObject from the Scene list. This tells the code to assign that object to the PlayerBaseObject field at runtime.
Adjust Coordinate System
From here on out the code comes very close to mirroring the browser based version but reorganized into a Unity MonoBehaviour. I’ve opted to use Unity’s default scene scale and orientation, which doesn’t exactly match the HTML5 canvas. To compensate, the following values are used as multipliers during updates:
private float _coordScaleFactorX = 0.01f;
private float _coordScaleFactorY = -0.01f;
Startup
With MonoBehavior as the base class, there are two methods called by the game engine during runtime: Start and Update. As you probably guessed, Start is only called when the app starts. Update is called once per frame.
In Start we do some housekeeping and initializations.
SetVisibile (PlayerBaseObject, false);
Hides our base player object so we can create new instances as the real players.
GroundPlane = new Plane(Vector3.up, transform.position);
Creates an invisible ground plane to use as a target for mouse clicks. The visible one in the scene is only there for visual representation.
_socketObject = GameObject.Find(“SocketIO”);
_socketComponent = _socketObject.GetComponent<SocketIOComponent>();
_socketComponent.On(“enteredGame”, EnteredGame);
_socketComponent.On(“playerDisconnected”, PlayerDisconnected);
_socketComponent.On(“playerChanged”, PlayerChanged);
_socketComponent.Connect ();
This code finds the SocketIO prefab instance, assigned the event methods and connects to the server socks as set in the URL field.

Animation and Frame Updates
To capture the mouse click event and find the coordinate clicked, see the following code.
if (Input.GetButtonDown(“Fire1")) {
     var ray = Camera.main.ScreenPointToRay(Input.mousePosition);
     float distance;
     if (GroundPlane.Raycast(ray, out distance)){
          Vector3 hitPoint = ray.GetPoint(distance);
          SetTarget(hitPoint);
     }
}
UpdateLocalPlayer ();
On each frame we need to determine if our player has moved and if so emit a message indicating where it moved to. This method can be improved by limiting the frequency of updates to an interval of frames rather than on every frame.
Action
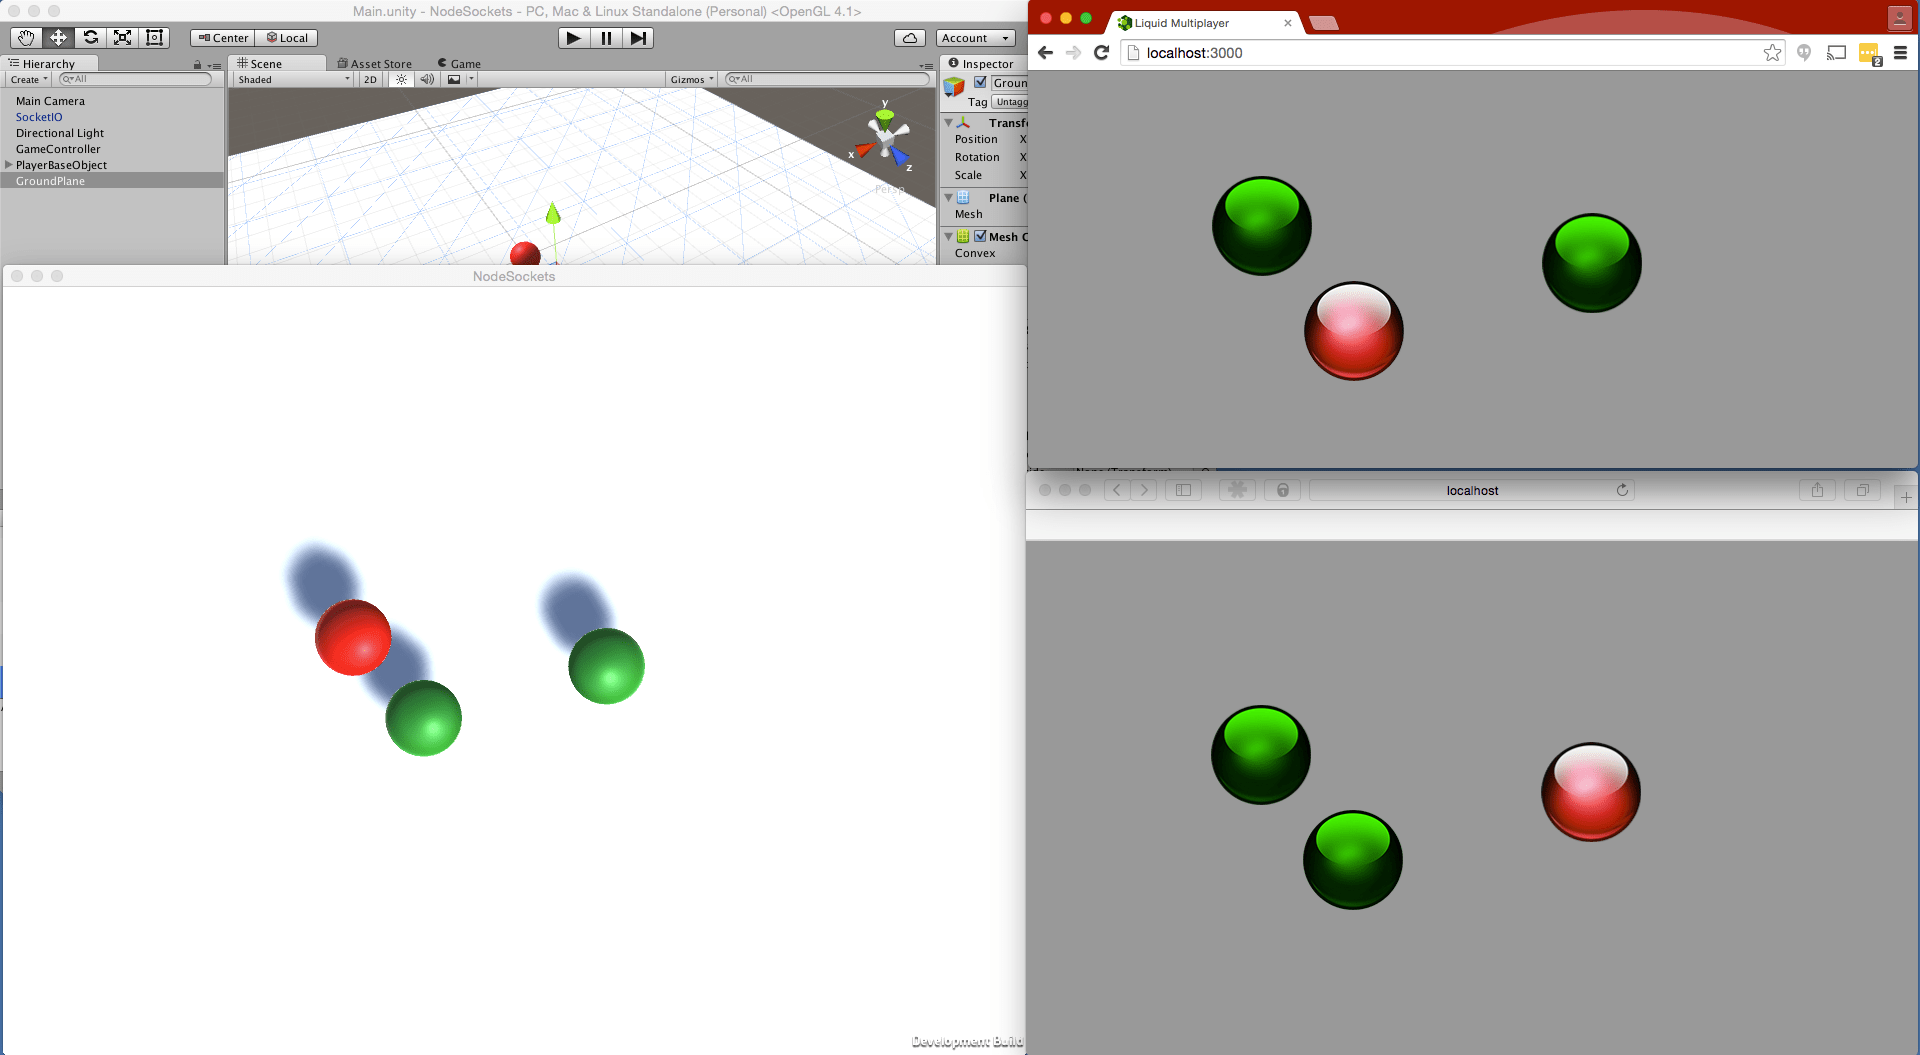
The remainder of the code is almost identical to the JavaScript version with minor differences to accommodate C#, a strongly-typed language. So lets build and run the app to see it in action!
First, don’t forget to start the node server and browse to :3000 in any number of browsers.
slc run
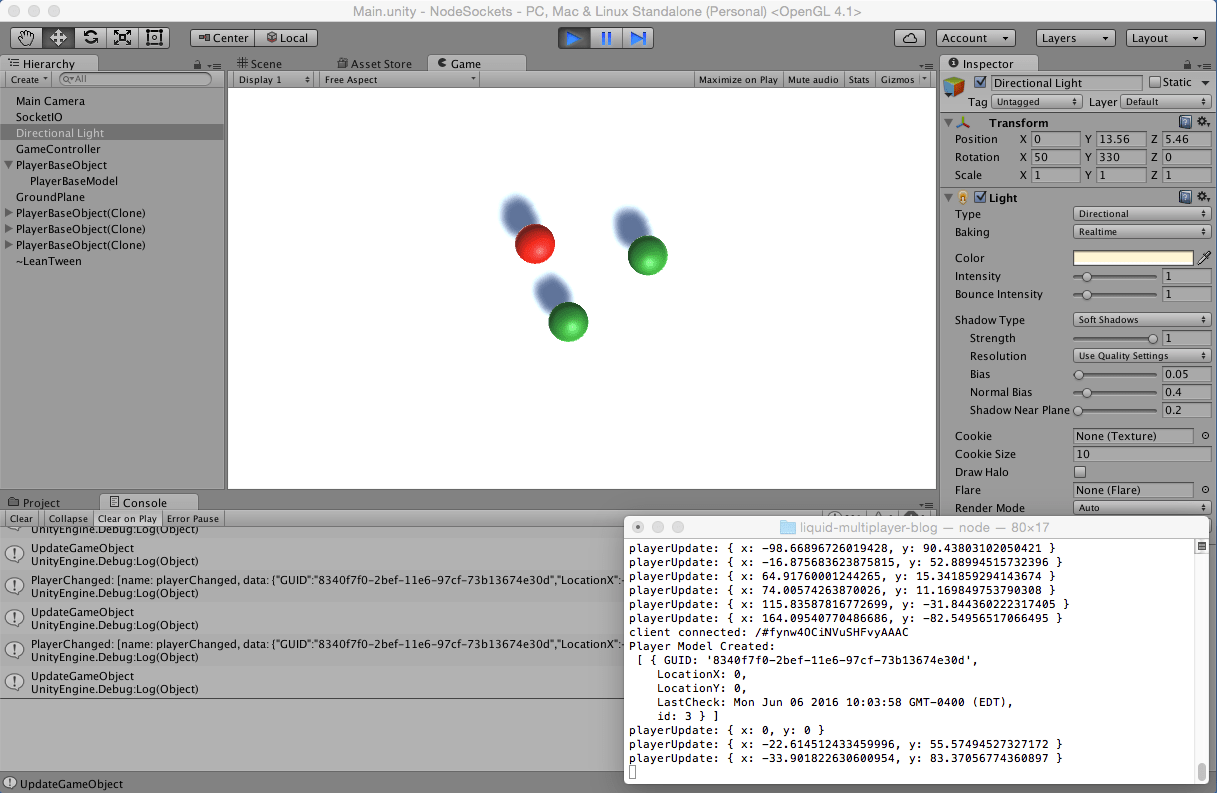
Then in Unity, choose File -> Build & Run. If all is well you will see something like this…
Bringing the console windows to the foreground we can see the debug logs.
Next Steps
Now that we have Unity and HTML5 running on the same node.js backend, what can we do with this power? Stay tuned for my next post where we throw VR into the mix.
Other Posts in This Series
- Recipe for Real Time Multiplayer with HTML5 Canvas & Node.js Part 1: Backend
- Recipe for Real Time Multiplayer with HTML5 Canvas & Node.js Part 2: Client
- Real Time HTML5 Canvas & Node.js: Now with Sockets!
Related Links
Let us put our HTML5 skills to work for you! Contact us to find out how Liquid can help.