
It’s been 2 years since my first post on integrating campaign monitor with Umbraco. This spring we at Liquid refreshed our website. Umbraco V7 (codenamed Belle for its beautiul new UI) had since been released, so it was time to retire our trusty Umbraco 4.x site and move to the world of Umbraco 7. This change, of course required a custom editor for our mailing list settings.
The process was very simple. In fact, with Umbraco V7 you can technically create a custom property editor without a single line of c# code.
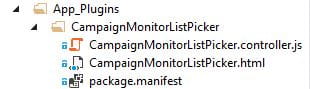
All that is needed is to create a folder under the /app_plugins directory and place the following files there:
- The package manifest, telling umbraco what to load
- The html view for the editor
- The controller for wiring up the editor with angular.js
The details of these steps are clearly documented here.
So lets walk through a our very simple “CampaignMonitorListPicker” property editor which allows the back office user to choose a Campaign Monitor mailing list.
The Manifest:
            {
    propertyEditors: [
     {
       alias: "liquidV7.CampaignMonitorListPicker",
            name: "Campaign Monitor List Picker",
            editor: {
         view: "~/App_Plugins/CampaignMonitorListPicker/CampaignMonitorListPicker.html"
       }
     }
   ]
   ,
    javascript: [
     '~/App_Plugins/CampaignMonitorListPicker/CampaignMonitorListPicker.controller.js'
   ]
 }
alias: unique name of the property editor
name: friendly name of the property editor
editor: the html to be used in the editor
javascript: an array of files to be injected into the view at app_start
The view:
  <div ng-controller="liquidV7.CampaignMonitorListPickercontroller">
     <div class="radio" ng-repeat="list in lists">
     <label>
     <input ng-model="model.value" value="{{list.ListID}}" type="radio" name="list">
       {{list.Name}}
     </label>
   </div>
   </div>
The controller:
 angular.module("umbraco")
   .controller("liquidV7.CampaignMonitorListPickercontroller",
    function ($scope, $http) {
      $scope.loading = true;
      $http({ method: 'GET', url: 'backoffice/LiquidV7/CMApi/GetAll' })
        .success(function (data) {
          $scope.lists = data;
          $scope.loading = false;
        })
        .error(function () {
          $scope.error = "An Error has occured while loading!";
          $scope.loading = false;
        });
    });
Now, remember how i said you can create a controller without c# code? Well...here is the rub. The prevalues in this case come from an external source: Campaign Monitor. Therefore, in this case I needed a way for the javascript controller to pull those from the back end.
The solution was to to do so via a simple umbraco API Controller:
 namespace LiquidV7.Controllers
 {
   [Umbraco.Web.Mvc.PluginController("LiquidV7")]
   public class CMApiController : UmbracoAuthorizedJsonController
   {
     public IEnumerable<createsend_dotnet.BasicList> GetAll()
     {
       string apiKey = WebConfigurationManager.AppSettings["api_key"] as string;
       string clientId = WebConfigurationManager.AppSettings["api_client_id"] as string;
       CampaignMonitorHelper cm = new CampaignMonitorHelper(apiKey, clientId);
       IEnumerable<createsend_dotnet.BasicList> lists = cm.GetLists();
       return lists;
     }
   }
 }
A couple things of note in the code above:
- [Umbraco.Web.Mvc.PluginController("LiquidV7")] which ensures that it is auto-routed.
- The API controller inherits from UmbracoAuthorizedJsonController. This ensures that the controller can only be accessed if the user is logged into the back office.
Otherwise, it is very simple, returning the mailing lists within the Liquid Campaign monitor account to the Javascript controller, which in turn populates the html view to result in the datatype you see below:

This ultra-simple implementation is all that was needed for this purpose. Of course you could take this much further. For instance, change the html view to display a checkbox list to allow for multiple mailing lists being selected. Additionally, if the campaign monitor mailing list is a datasource that is shared amongst other datatypes - or if you simply want to do things in a more tidy manner, you could make the mailing list data source a resource and simply reference the resource in the js controller such as explained here.